How To Attach Fringe To Crochet Scarf
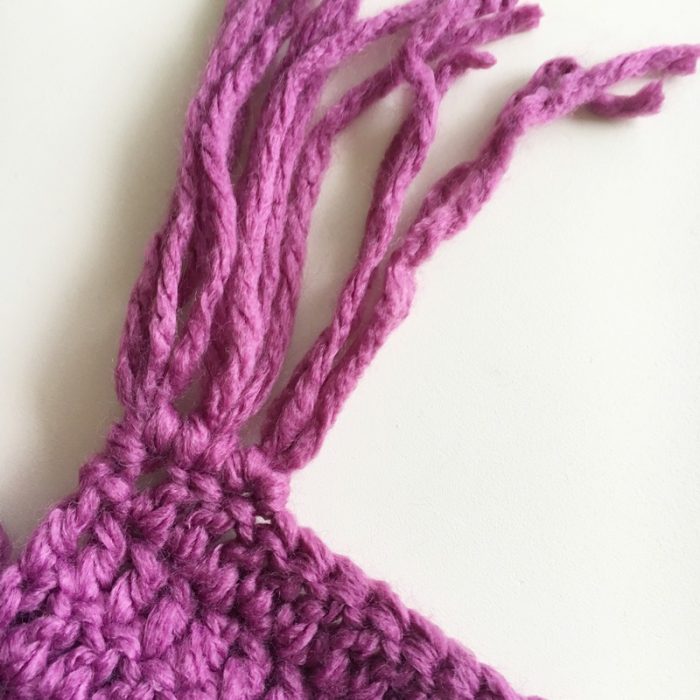
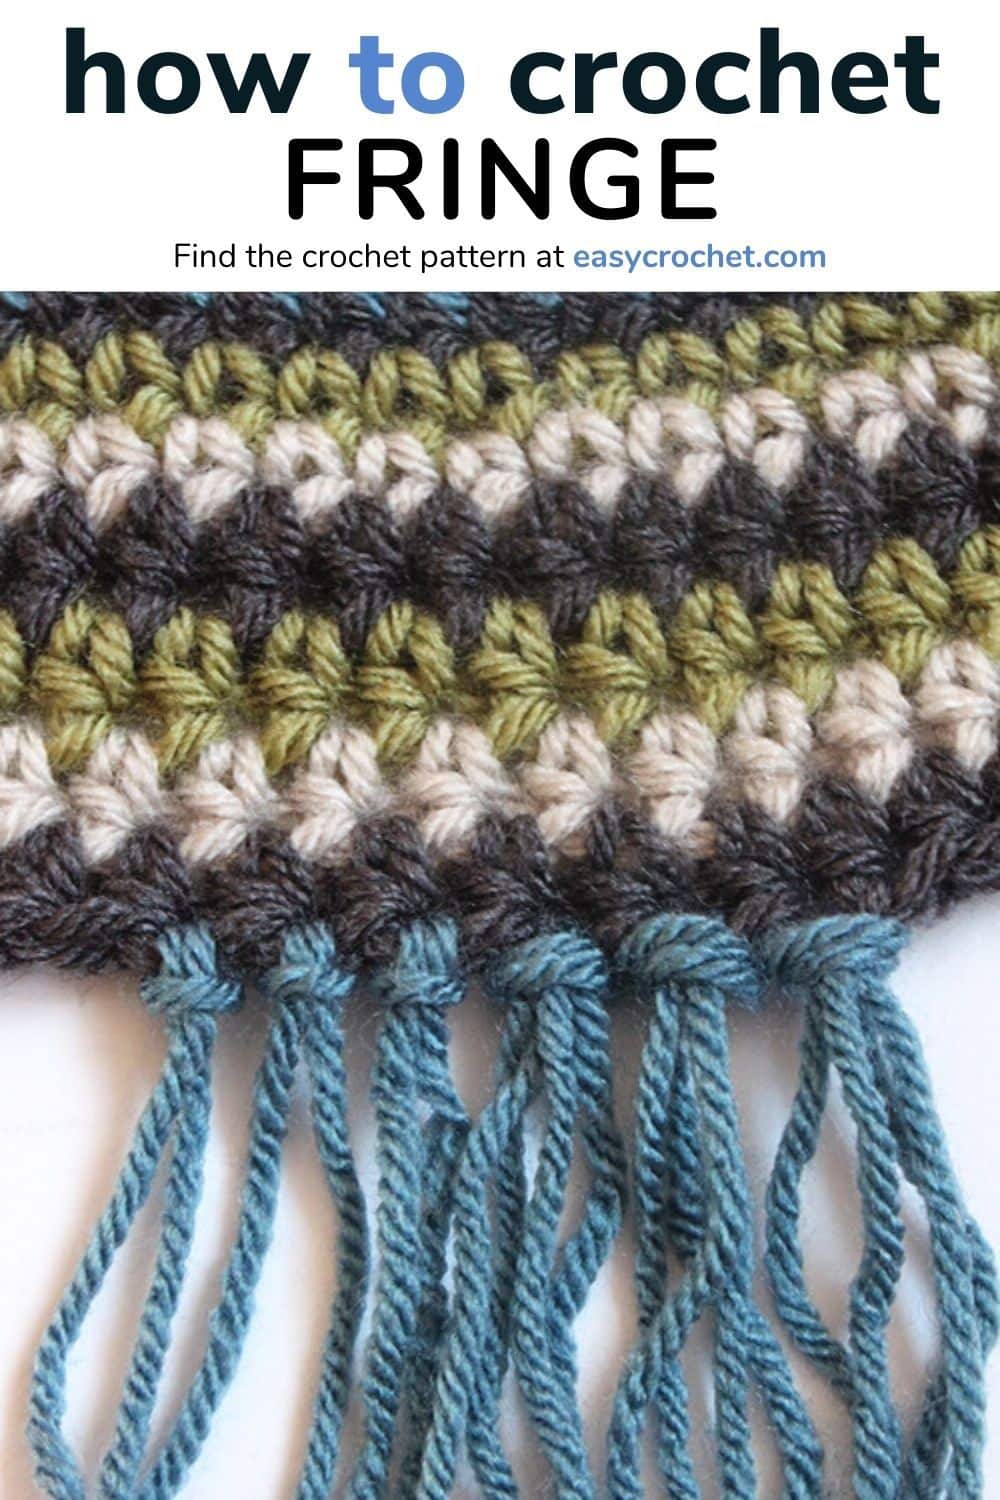
How To Attach Fringe To Crochet Scarf - Grab the folded yarn with the hook and pull it part way through to form a. Go the last stitch, and follow the same steps. Web in this video i will show you how easy it is to add fringe to a crochet (or knit) project! Web the easy beginner fringe scarf is a pretty and super easy to crochet scarf worked flat with basic stitches and topped off with fabulous fringe. How to add tassels / fringe to your projects. Fringing a project can be the final touches to elevate a project's visual look. This scarf is worked flat and in rows. Adding tassels can seem like a fiddly job, but it's much easier than you. Web wondering how to add fringe to your scarf or shawl? Web insert a crochet hook from the wrong side to the right side at the point you want the fringe. The twisted fringe is added last. Pull the tail to tighten the loop. This is where you take yarn and wrap it around an object then cut the bottom. Men's crochet scarf pattern free. While it may seem intimidating, i promise you that it's not as difficult as it looks! A great average length is 6 inches long. This scarf is worked flat and in rows. Web absolute beginner crochet series ep 10: It is also great for. This free crochet scarf pattern is perfect for beginners. How to add tassels / fringe to your projects. Pull the tail to tighten the loop. Thick crochet scarf pattern free. It is also great for. And if you like the scarf pictured in this tutorial, you can find the free pattern for it here. Men's crochet scarf pattern free. Web adding fringe can add that extra pop when finishing your crochet projects. The twisted fringe is added last. Web learn to add fringe to crochet scarves and knit projects with this guide on choosing yarn lengths and attaching them for a stylish finish. How to make perfect fringe. It add such a fun flair to a finished scarf, top, or blanket. It is also great for. This free crochet scarf pattern is perfect for beginners. Web insert a crochet hook from the wrong side to the right side at the point you want the fringe. Web wondering how to add fringe to your scarf or shawl? Web free pattern and tutorial on how to crochet fringe on a scarf / cowl. Grab the folded yarn with the hook and pull it part way through to form a. This free crochet scarf pattern is perfect for beginners. Pull the tail to tighten the loop. Web learn to add fringe to crochet scarves and knit projects with this. Pull the tail to tighten the loop. Web in this video i will show you how easy it is to add fringe to a crochet (or knit) project! This scarf is worked flat and in rows. This free crochet scarf pattern is perfect for beginners. Go the last stitch, and follow the same steps. How to make perfect fringe. Men's crochet scarf pattern free. Adding tassels can seem like a fiddly job, but it's much easier than you. This free crochet scarf pattern is perfect for beginners. It add such a fun flair to a finished scarf, top, or blanket. Web the easy beginner fringe scarf is a pretty and super easy to crochet scarf worked flat with basic stitches and topped off with fabulous fringe. Web use your fingers to pull all the strands of the yarn tail through all the strands of the loop. Web easy crocheted hats for beginners. Web absolute beginner crochet series ep 10: Adding. Thick crochet scarf pattern free. How to add tassels / fringe to your projects. Web insert a crochet hook from the wrong side to the right side at the point you want the fringe. This free crochet scarf pattern is perfect for beginners. Decide how long you want your fringe to be. A great average length is 6 inches long. Pull the tail to tighten the loop. Fringing a project can be the final touches to elevate a project's visual look. Adding tassels can seem like a fiddly job, but it's much easier than you. This scarf is worked flat and in rows. Web learn to add fringe to crochet scarves and knit projects with this guide on choosing yarn lengths and attaching them for a stylish finish. The twisted fringe is added last. And if you like the scarf pictured in this tutorial, you can find the free pattern for it here. Web in this video i will show you how easy. Web adding fringe can add that extra pop when finishing your crochet projects. How to add tassels / fringe to your projects. Thick crochet scarf pattern free. How to make perfect fringe. And if you like the scarf pictured in this tutorial, you can find the free pattern for it here. Web the easy beginner fringe scarf is a pretty and super easy to crochet scarf worked flat with basic stitches and topped off with fabulous fringe. It is also great for. Pull the tail to tighten the loop. This scarf is worked flat and in rows. A great average length is 6 inches long. This free crochet scarf pattern is perfect for beginners. Web the easiest way i’ve found to add fringe to my crocheted scarves is to use the wrapping method. Web use your fingers to pull all the strands of the yarn tail through all the strands of the loop. While it may seem intimidating, i promise you that it's not as difficult as it looks! It add such a fun flair to a finished scarf, top, or blanket. The twisted fringe is added last.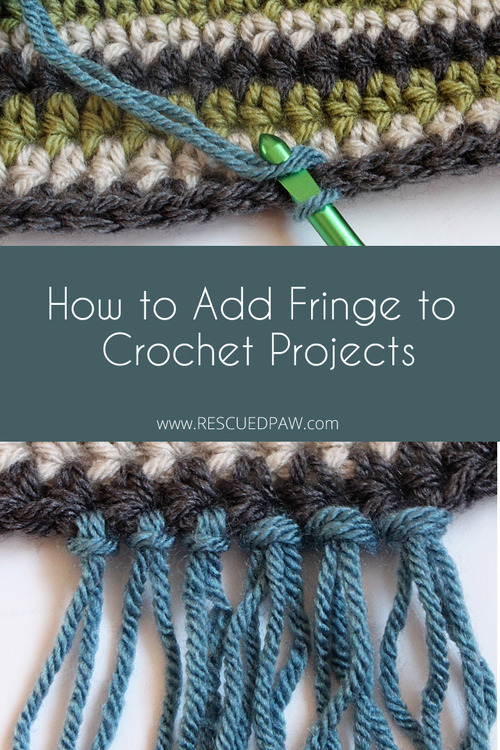
How to Add Fringe To Crochet Patterns Free Crochet Tutorial

How to add fringe to a crochet project Step by step photo tutorial
How to Add a Fringe to a Scarf • The Crafty Mummy

How to Add a Fringe to a Scarf Crochet scarf tutorial, Fringe scarf

How To Add Fringe To A Scarf Knit With Hannah Beginner knitting

How to Make and Add Fringe to a Crochet Scarf (Plaid Scarf For
Adding Fringe to Your Crochet Scarves and Blankets A Guide Easy

How to add fringe to a crochet project Step by step photo tutorial

How to Add a Fringe to a Scarf • The Crafty Mummy Scarf yarn, Crochet

How to Add a Fringe to a Scarf Crochet for beginners blanket, Scarf
Web Here Is A Step By Step Tutorial For How To Add Fringe To A Crochet Project!
Web In This Video I Will Show You How Easy It Is To Add Fringe To A Crochet (Or Knit) Project!
Men's Crochet Scarf Pattern Free.
This Is Where You Take Yarn And Wrap It Around An Object Then Cut The Bottom.
Related Post: