Rib Knit Crochet
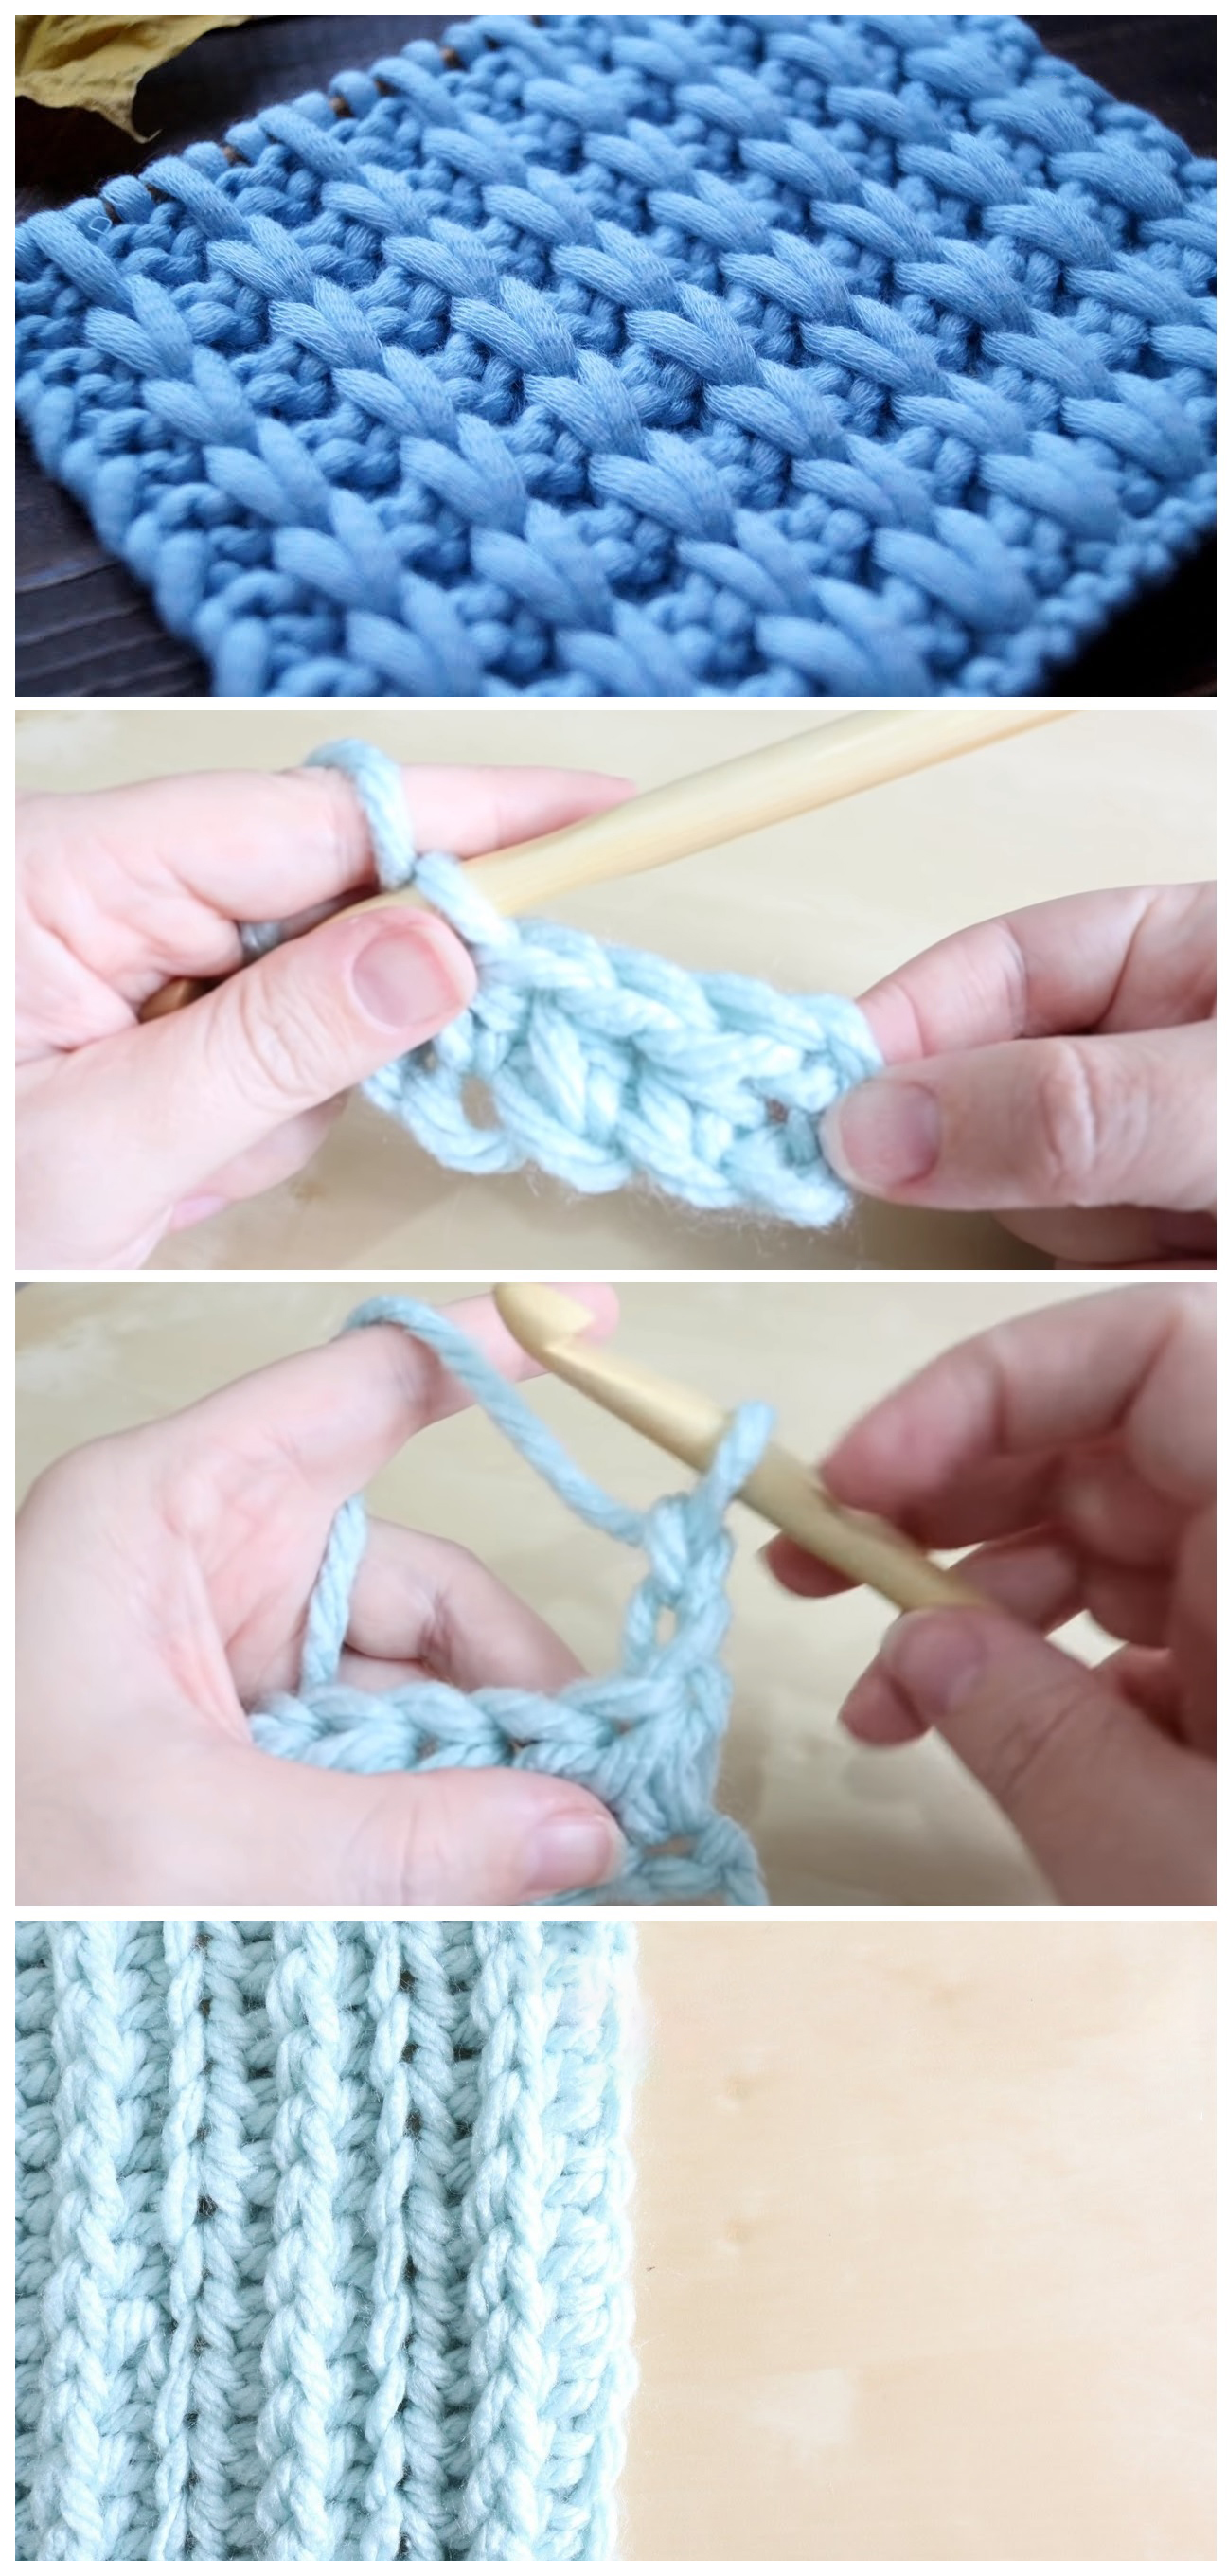
Rib Knit Crochet - Web how to make a knit look ribbing with crochet. Web ribbing is just for knitters, right? Web learning how to add crochet ribbing to a sweater, beanie, or other project is a skill that will help you finish your projects. Starting with 2nd chain from hook, work 1 sc in each ch back to edge of your project.join to the next st of the edge of your project using sl st and work one more sl st in the next st of your project (2 sl sts in total for joining) plus make ch1. Knitted ribbing is made of interlocked loops of yarn that stretch and spring back into position when pulled and released. In knitting ribbing is created by alternating stitches to make columns. Knit ribbing uses a combination of knit and purl stitches to create vertical ribs. Web the slip stitch ribbing is one of the best crochet rib stitches you can use for hat and sweater bands. Web here are 17 crochet and knit ribbed patterns from yarnspirations for you to stitch. Use the half double crochet rib stitch to give your crocheted projects a beautiful, knitted look. Ribbed items to wear are snug on your body, keeping warmth in without being too tight. Web how to make crochet look like knitting with the half double crochet rib stitch. Knitted ribbing is made of interlocked loops of yarn that stretch and spring back into position when pulled and released. Web learning how to add crochet ribbing to a sweater, beanie, or other project is a skill that will help you finish your projects. They add a fun decorative element that’s easy to do. Use the half double crochet rib stitch to give your crocheted projects a beautiful, knitted look. Ch any number of stitches. Chain 6 plus turning chain. Web the slip stitch ribbing is one of the best crochet rib stitches you can use for hat and sweater bands. This adds texture, stretch and visual interest to your designs, and is an easy way to mimic the look of ribbing in knitting. Discover new knitting techniques with gathered. This simple crochet rib stitch is versatile enough for a variety of yarn weights and textures. You can just as easily crochet ribbing, and this video tutorial by heidi gustad will show you how. Now simply repeat steps 2 & 3 until your piece is as long as you’d like! Ribbed patterns for the. Which means it even looks a lot like stockinette stitch in knitting. Ribbed items to wear are snug on your body, keeping warmth in without being too tight. Web this crochet ribbing resembles a lot knitting ribbing knit 1, purl 1. Make a row of single crochet stitches, chain 1 and turn. Rib stitches are named by the number of. This simple crochet rib stitch is versatile enough for a variety of yarn weights and textures. Except this swatch was worked. This by far is my favorite method. The only difference is that on the right side the ridges/arrows formed by the stitches are pointing down and on the wrong side they are pointing up as seen in the picture. Web the 2 types of crochet ribbing. This simple crochet rib stitch is versatile enough for a variety of yarn weights and textures. You just make a row of single crochet stitches, and then work the next row with slip stitches under both loops. You can just as easily crochet ribbing, and this video tutorial by heidi gustad will show. Web how to make crochet look like knitting with the half double crochet rib stitch. Web how to make a knit look ribbing with crochet. In knitting ribbing is created by alternating stitches to make columns. Web learn how to do crochet ribbing with this easy tutorial for beginners. Discover new knitting techniques with gathered. Now simply repeat steps 2 & 3 until your piece is as long as you’d like! You can just as easily crochet ribbing, and this video tutorial by heidi gustad will show you how. There are quite a few crochet techniques that i have tried to get the crocheted fabric to mimic knitting. Web this crochet ribbing resembles a lot. I absolutely love this ribbing. Web learn this stretchiest way to crochet ribbing! Web the 2 types of crochet ribbing. Now simply repeat steps 2 & 3 until your piece is as long as you’d like! Web here are 17 crochet and knit ribbed patterns from yarnspirations for you to stitch. Web make a single crochet (sc) stitch into the second chain from the hook. The only difference is that on the right side the ridges/arrows formed by the stitches are pointing down and on the wrong side they are pointing up as seen in the picture below. Skip the chain that's closest to your hook and push the tip of. This simple crochet rib stitch is versatile enough for a variety of yarn weights and textures. By alternating rows of single crochet stitches and slip stitches, learn how to crochet ribbing and create a ribbed piece that looks just like the knitters make. Ch 1, blo sl st across, sl st in last st, turn. Web ribbing is just for. Web the slip stitch ribbing is one of the best crochet rib stitches you can use for hat and sweater bands. Web ribbing is just for knitters, right? A rib in a crochet, you need to work sideways, so that your rows of crochet resemble the rows of a knitting ribbing. When you alternate one knit stitch with one purl. Crochet techniques to know first. In knitting ribbing is created by alternating stitches to make columns. There are quite a few crochet techniques that i have tried to get the crocheted fabric to mimic knitting. Knit ribbing uses a combination of knit and purl stitches to create vertical ribs. Web learning how to add crochet ribbing to a sweater, beanie, or other project is a skill that will help you finish your projects. Step by step instructions and photos for 5 easy styles of rib. The only difference is that on the right side the ridges/arrows formed by the stitches are pointing down and on the wrong side they are pointing up as seen in the picture below. Web make a single crochet (sc) stitch into the second chain from the hook. Typically these textured lines are vertical (as worn) and provide elasticity or offer strength, support or structure to the fabric (think how the bones in the rib cage offer structure!). You will love the stretchy result! By alternating rows of single crochet stitches and slip stitches, learn how to crochet ribbing and create a ribbed piece that looks just like the knitters make. Web ribbing is just for knitters, right? Web how to make crochet look like knitting with the half double crochet rib stitch. Starting with 2nd chain from hook, work 1 sc in each ch back to edge of your project.join to the next st of the edge of your project using sl st and work one more sl st in the next st of your project (2 sl sts in total for joining) plus make ch1. It’s stretchy and reversible, looking great on both sides of the work; For step 2 throughout the remainder of the.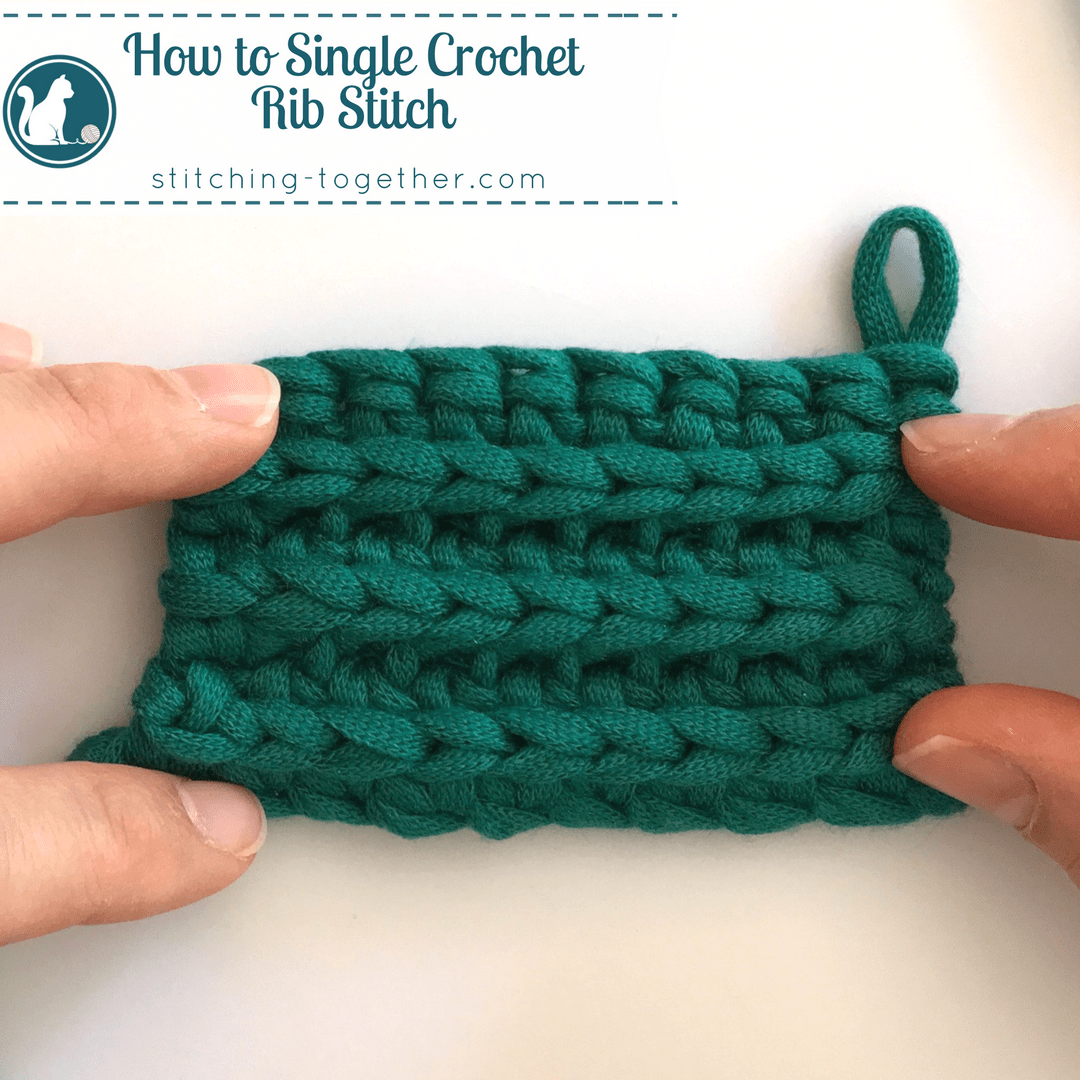
How to Single Crochet Rib Stitch

Easy Lacy Rib Knitting Stitch Pattern Edie Eckman

Three Rib Variations Single Rib, Fisherman’s Rib and Brioche Stitch

Single Rib Crochet Stitch Tutorial Dream a Little Bigger

How to crochet ribbing MyCrochetory Easy crochet hat patterns
How To Crochet Ribbing Mama In A Stitch

How to Crochet Ribbing! Ribbed crochet, Crochet stitches tutorial
Crochet Ribbed Knit Stitch Free Tutorial Tutorials & More

How to Single Crochet Rib Stitch Crochet stitches tutorial, Ribbed

A directory of crochet rib stitch patterns and ribbing techniques
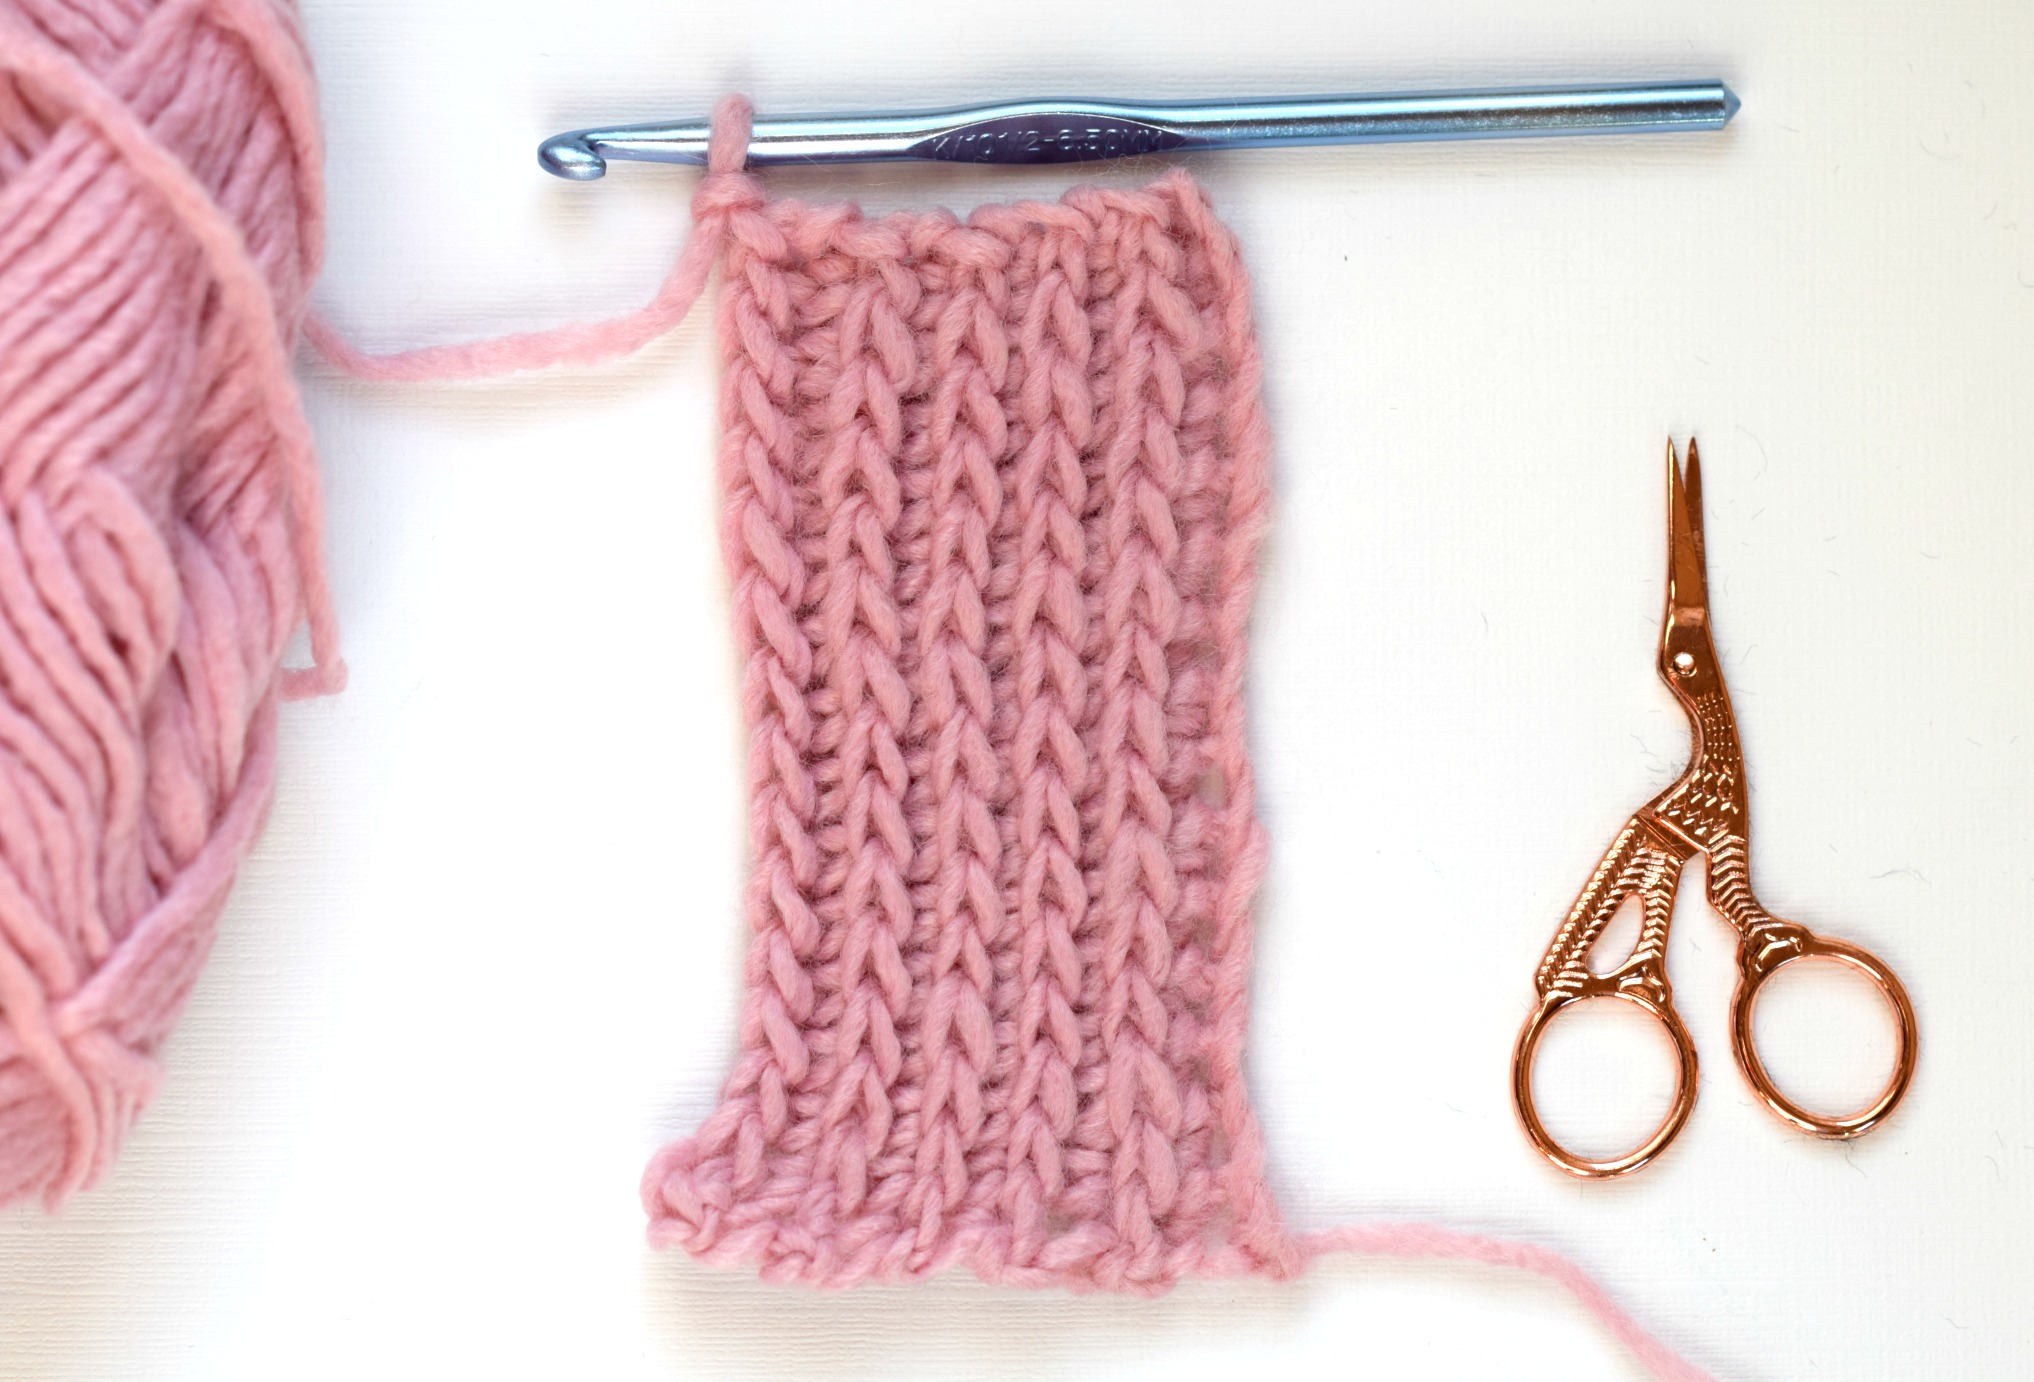
This Adds Texture, Stretch And Visual Interest To Your Designs, And Is An Easy Way To Mimic The Look Of Ribbing In Knitting.
Ribbed Patterns For The Home;
Web Learning How To Crochet A Rib Stitch Is Easy!
It Creates An Incredibly Stretching Fabric And It Looks A Lot Like Knitting!
Related Post: